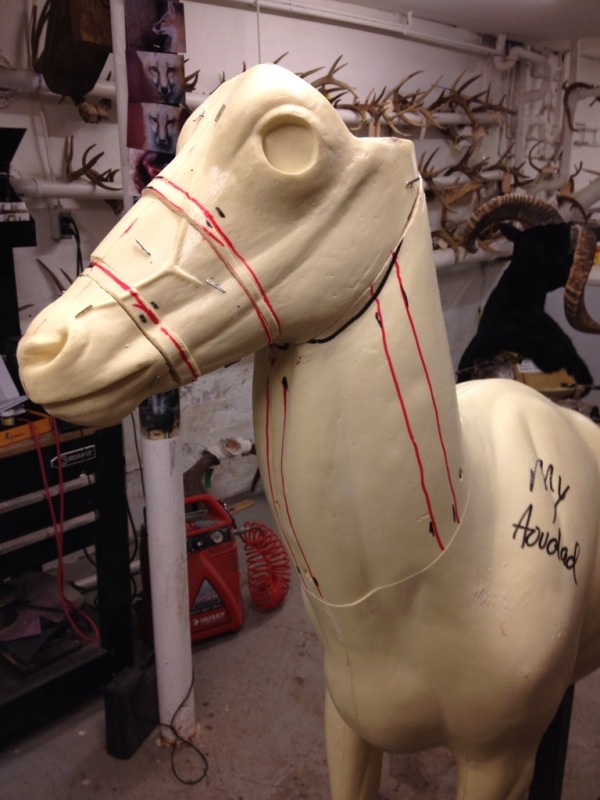
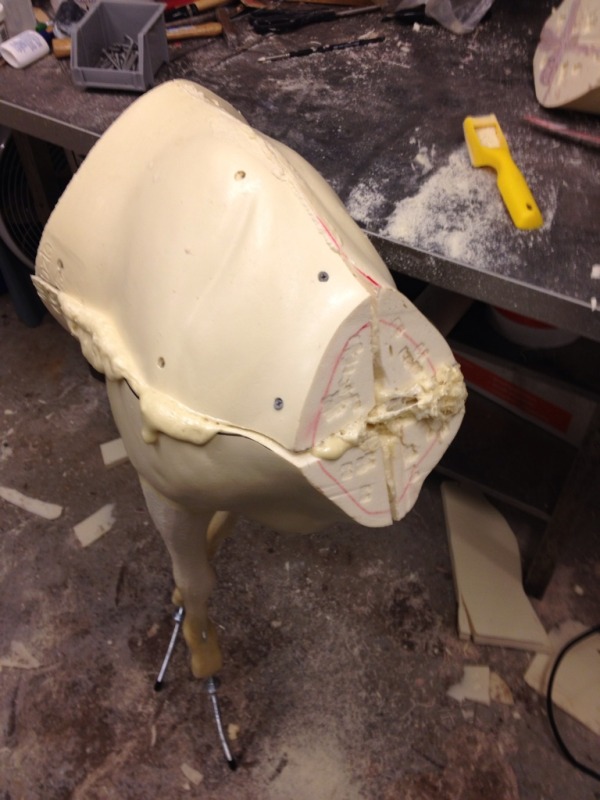
This shows the original size of the manikin purchased from my supplier. I then used the skin to tell me how much foam needed to be removed and used a marker to draw out the plan. The head, neck, and chest were all way too large.
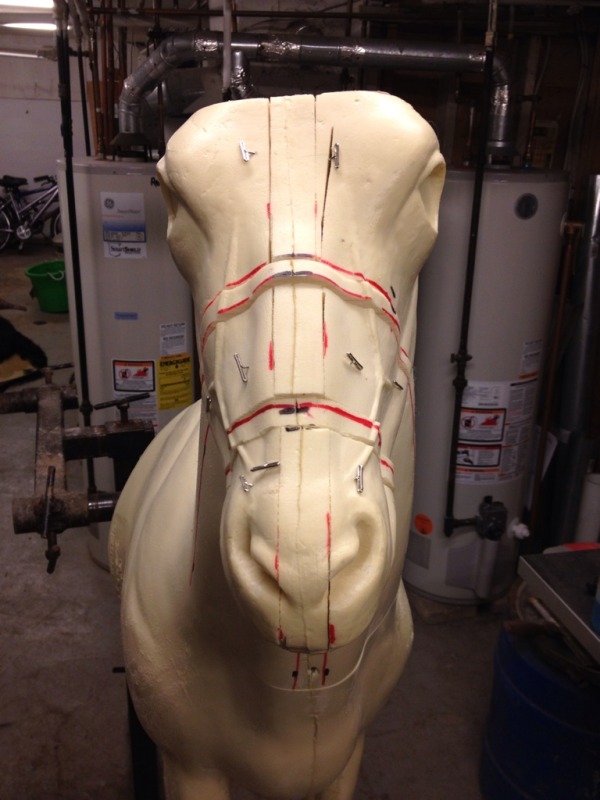
You can see here, I removed (2) 1/2" sections to reduce the length of the face. I also removed 1" on the width of the head. (everything was pinned back into place for photos)

Here is the head, after all the areas were removed and the (6) pieces were put back together using BONDO.
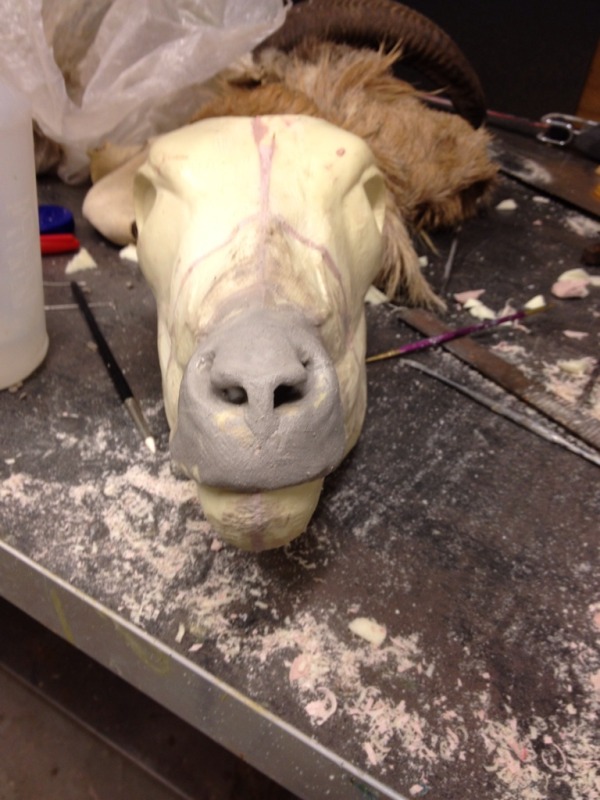
Once the BONDO hardened, I sanded all the seems and resculpted the septum and nostrils that were gone from the previous altering needed.
|
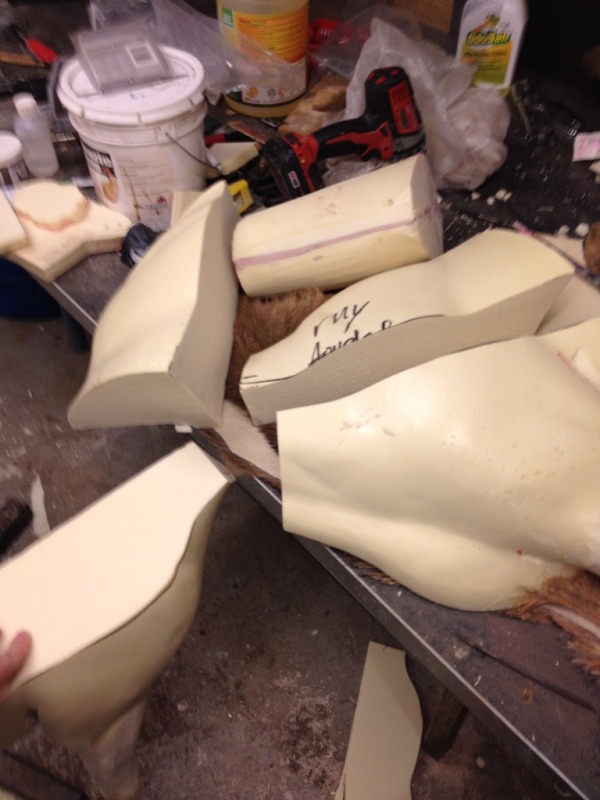
Here lies the chest and neck. The neck is shown already cut into (4) and reassembled after removing 6" of girth. The chest has been cut into (4) pieces as well, all while removing plenty of excess foam in the process.
Here I used expanding (2) part foam to glue the puzzle back together. The seems and flashing need to be sanded down.
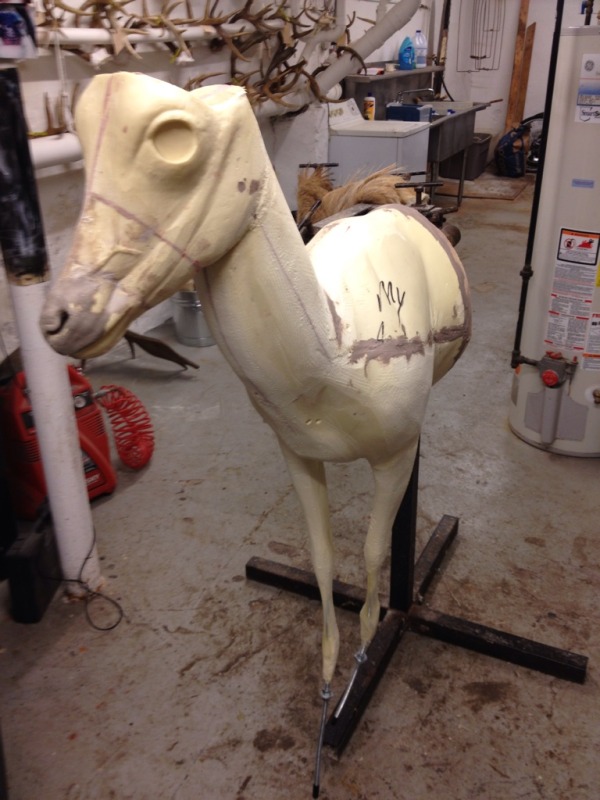
Foam was then used again to re-assemble the manikin, then all the seems were sanded and filled with clay where needed. The skin was then test fit, and more rasping was needed around the knee joints and shoulder areas.
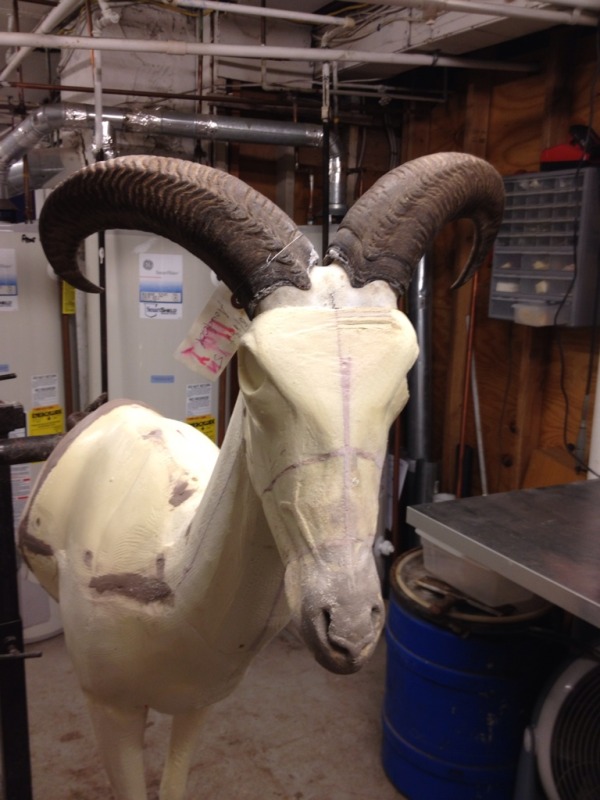
Finally, the horns were attached, and now the mounting process can finally be started. This is as far as I involved my camera on this project! Check back often for more "Behind the Scenes"
|
